Nonno ti penso
A custom design to keep alive the connection between grandparents and nephews
Customer:
A dear friend, name undisclosed for privacy
Challenge:
Create an object that grandparents get from their four nephews as present for 2016 Christmas. The object should keep a connection between the each nephew and the grandparents in a simple and discreet way
Year:
2016
Remote presence
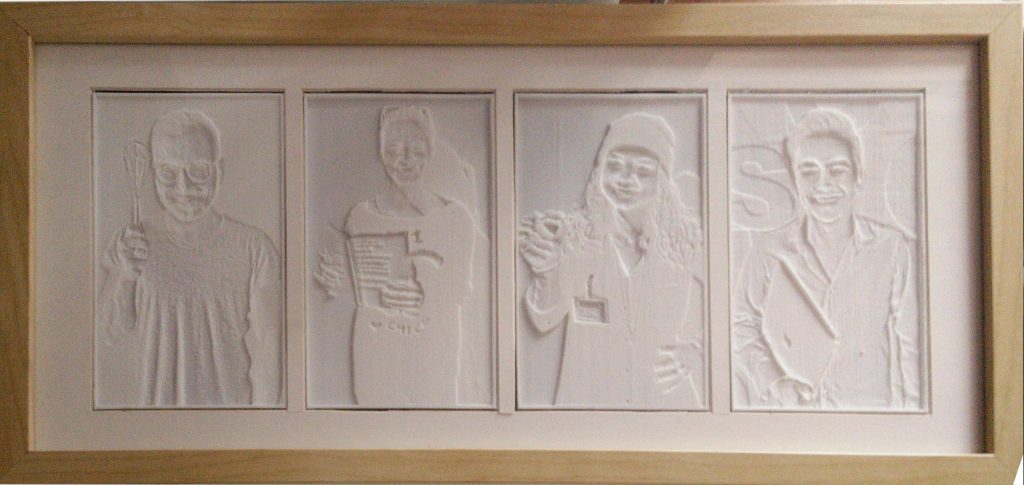
We live in a connected world, but the ways in which we communicate are sometimes too invasive. When Federico contacted me on behalf of the group of nephews, he was asking for something original, small enough to be put on a shelf, but with enough presence to be seen every time someone looked at the shelf. The concept was really vague and unfocused, so I tried to implement some sort of remote presence mixed with some strong visual. I wanted to apply some trendy technology and therefore 3D printing had to be one of the ingredients.
Even if Internet was something widely available, with WiFi in almost every house, I did not want to rely on an Internet of Things solution.
GSM and SMS were old, but very reliable solutions to connect mobile devices and a GSM module for the Arduino was very cheap to buy and easy to integrate. Following this lead, I developed the logic of the system: the sender of an SMS message is part of the header and it is easily recovered from the GSM module. The sender number is also something that is not easy to forge (or hack). Every nephew had a mobile phone with a known number, so it would have been easy to know who sent an SMS to the number associated with the SIM used by the GSM Module. Finding the right mobile phone provider was an issue because almost all the offers were based on a monthly fee but our need was for a plan with no fixed costs and just a pay-as-you-go tariff scheme. M2M (machine to machine) SIM was not available in a single quantity. After a lengthy search, we found a Poste Mobile solution that just needed a little recharge every 14 months to keep the SIM alive. With all the main issues solved it was possible to go to the hardware design part of the project.
Streamlined hardware
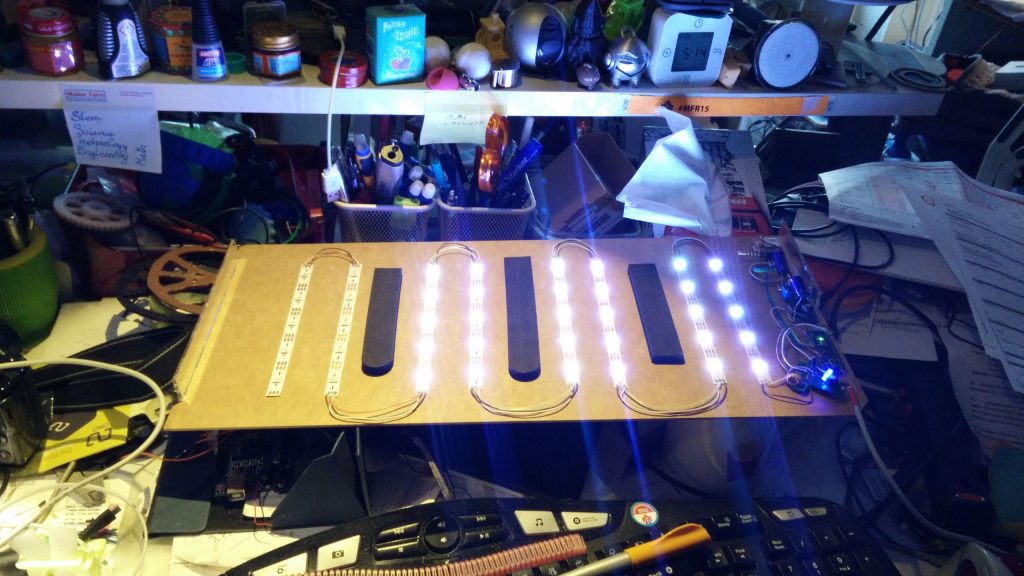
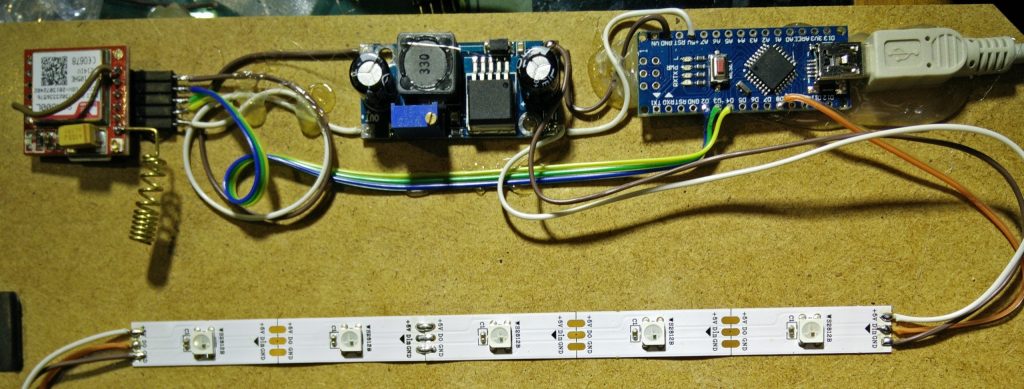
The Arduino NANO was more than enough to interface both the GSM module and the SmartLED strips. It wasn’t the first time I used a SIM800L GSM module, so I was already aware of the power requirements and this is why I added a DC-DC converter in the design. The first iteration of the design was powered by the PC, connected to the Arduino for programming and testing. Four groups of ten SmartLEDs each were glued on the MDF back of an Ikea RIBBA frame to backlight the four pictures of the nephews.
The coding wasn’t particularly complex and for the testing phase, I had a “debug” feature in the code that allowed me to light up every picture sending an SMS from my mobile phone.
The overall performance of the system was as expected. Thanks to the usage of a GSM module there was almost no set up time and the coverage was the whole of Italy. I did not tested the reception of SMS abroad, but according to the GSM specs, it could have been possible at no extra cost.
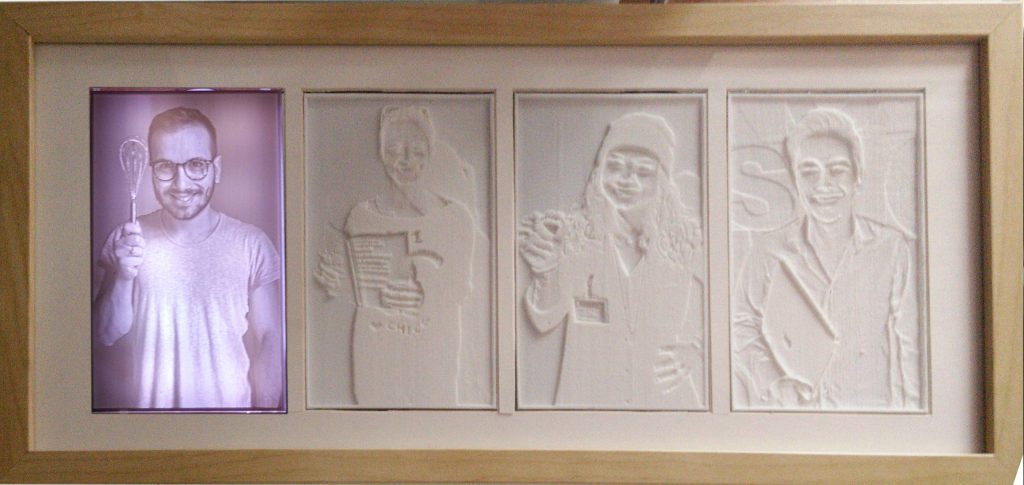
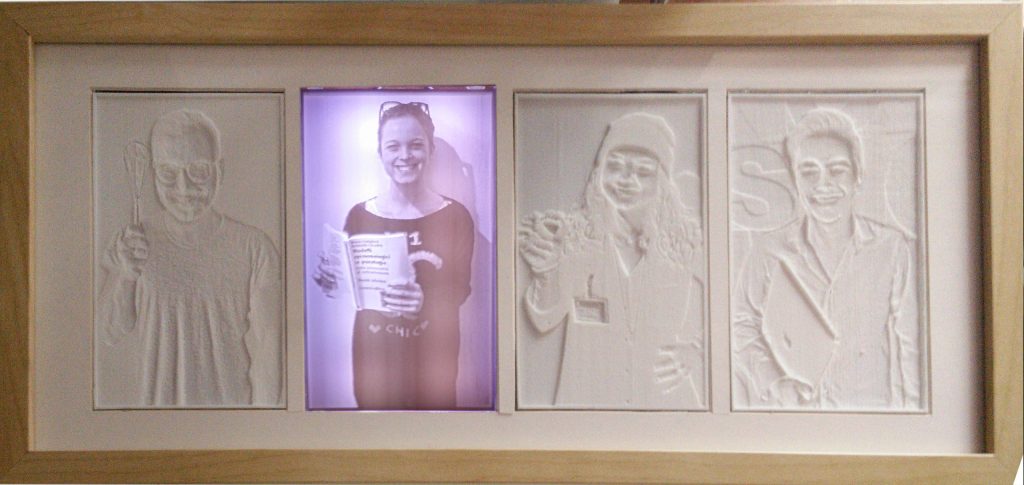
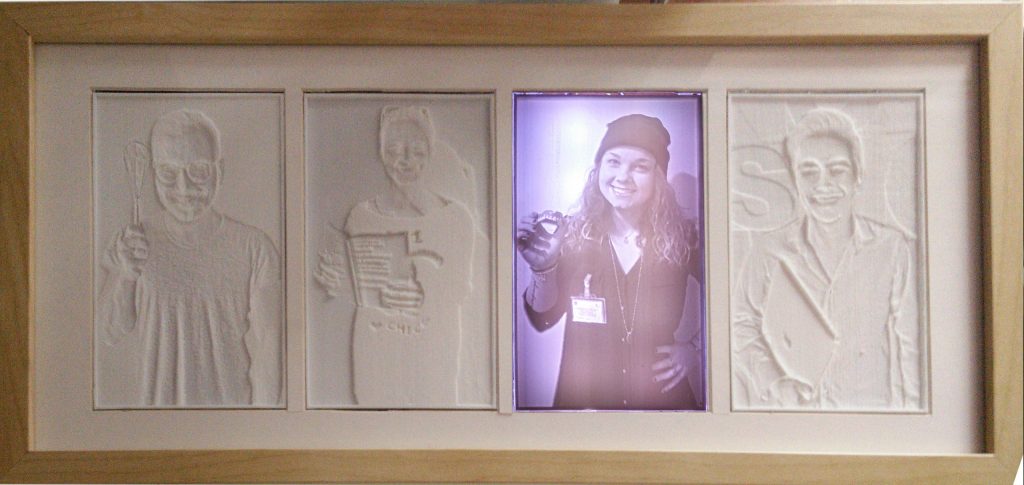
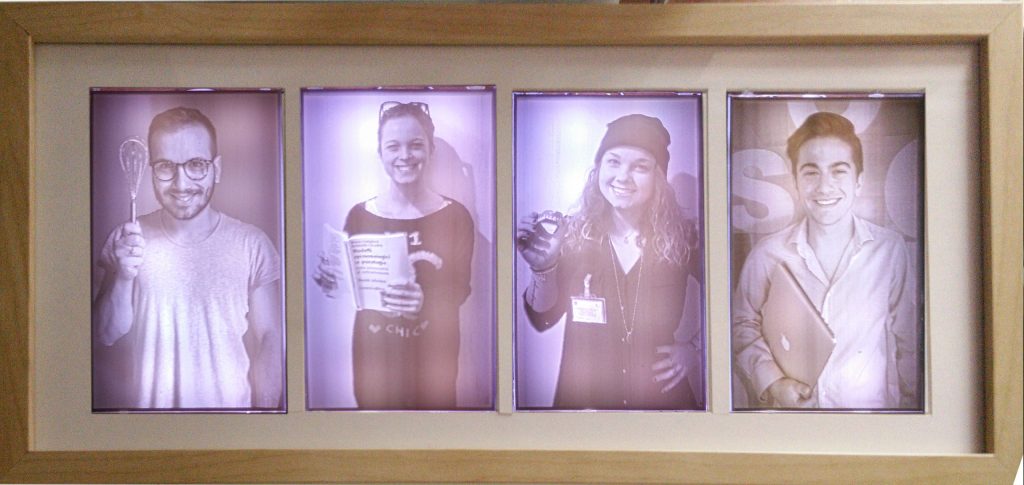
Thanks to this solution based on SMS, each nephew was able to lit up his picture on the frame for ten seconds, with a fade in and fade out effect. More than one picture could be lit at the same time and it was therefore possible for the nephews to organize together some light show for special occasions.
3d printing the pictures
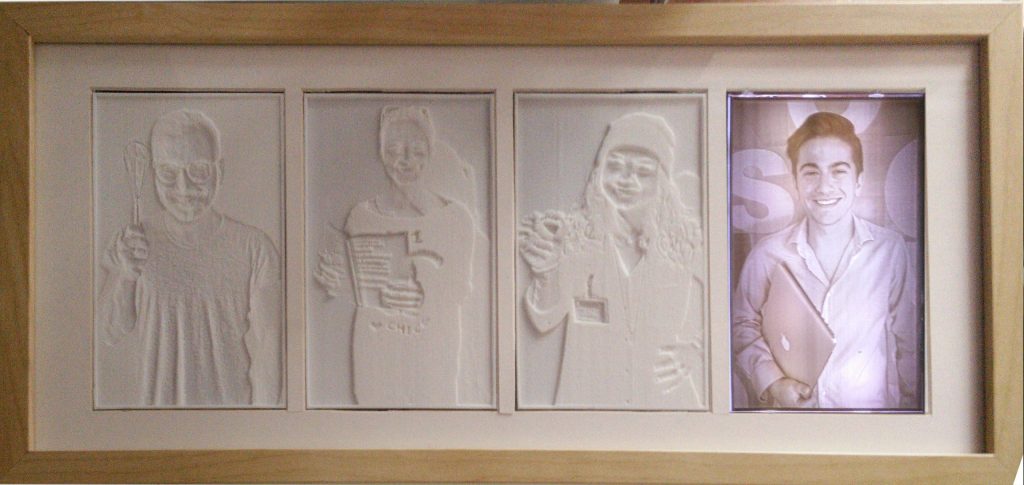
The options available to keep the pictures hidden until the backlight was triggered were a few, but I was looking for something cool and the lithophanes were a hot topic. A lithophane is like a filigree on paper, where the control over the thickness of the substrate creates a greyscale image when lit from behind. It was used at the end of the 19th century to hide images in the bottom of teacups and then this technique became a form of art for lampshades and other translucent objects.
With 3D printing, it returned to be popular and easy to fabricate thanks to specific applications that transformed grayscale pictures into 3D printable files. For this project I had to choose the flat and vertical 3D format, more difficult to print because the object was sticking to the build plate by a small thin surface and using “brim” wasn’t helping much. I failed a couple of prints, but in the end, I had my 4 lithophanes ready to be integrated into the design.
To get an even illumination of the panel, the LED strips had to be kept at least 20 mm away from the lithophane, exceeding the overall thickness of the frame. A little sacrifice to have an optimal result.
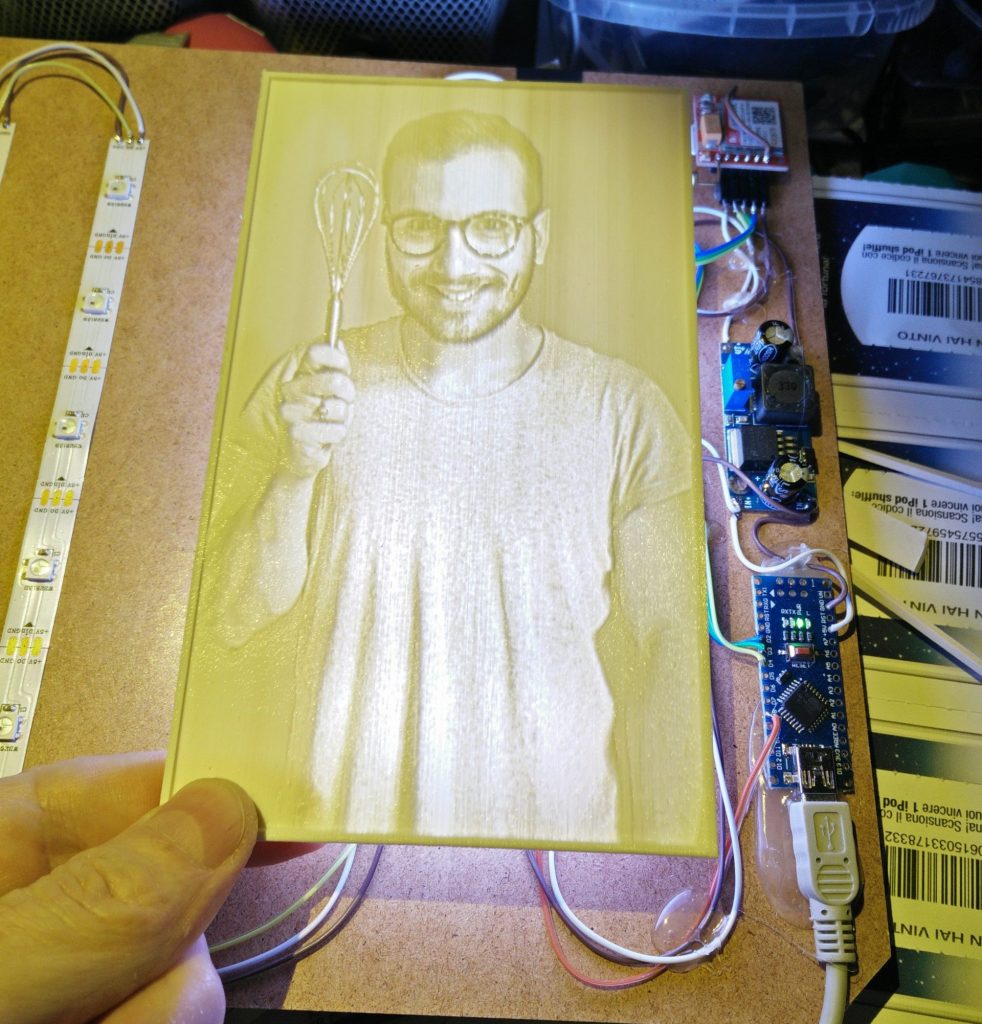
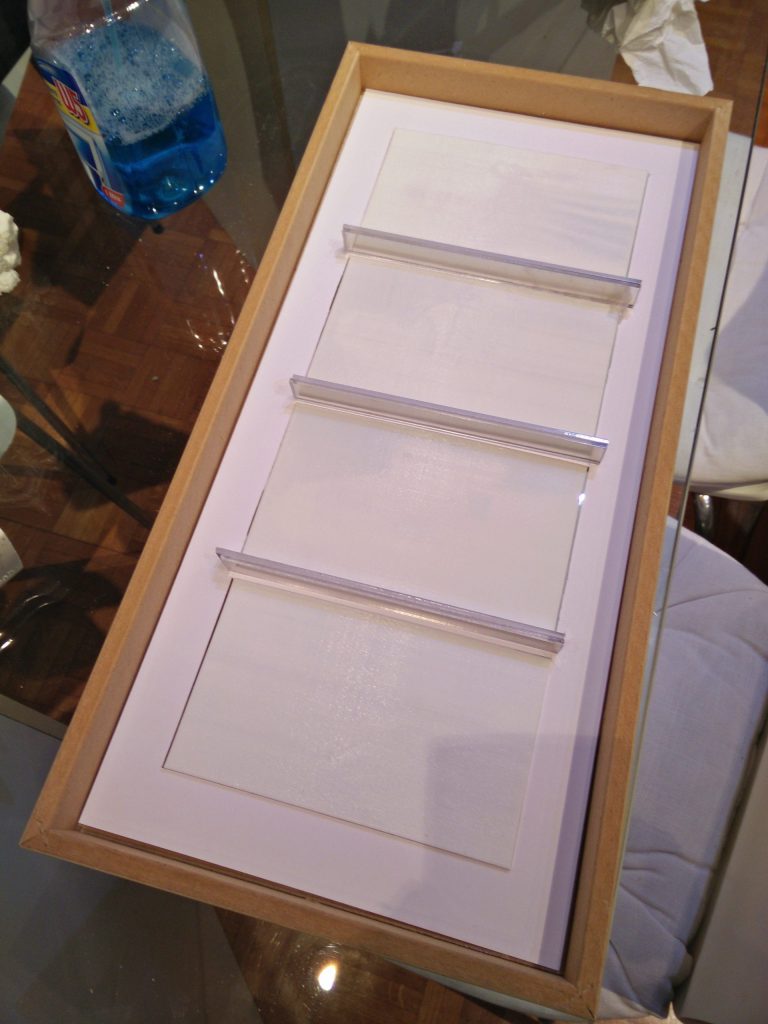
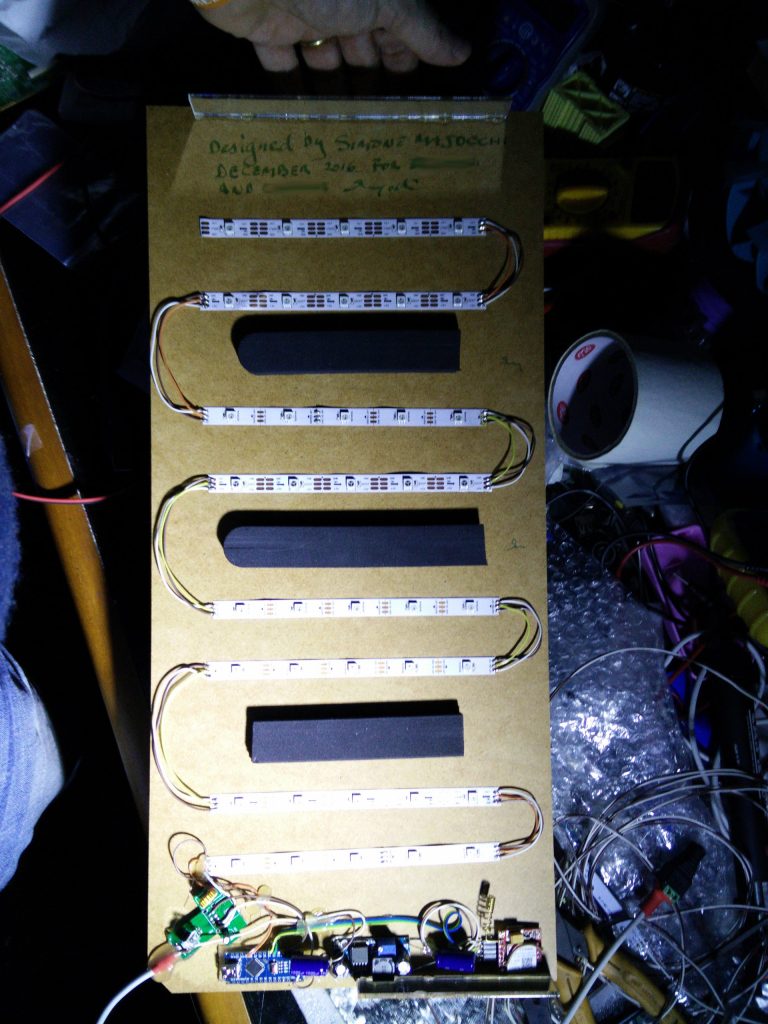
The final design of Nonno ti Penso before assembly and delivery.
